
Orders are created when a customer completes the checkout process, and they are visible by Admin and Shop Manager users only. Each order is given a unique Order ID.
You will need to be logged in to your wordpress dashboard.
- Go to yourdomainname.co.uk/wp-admin
- Type in your username & password
Viewing Orders
When you start taking orders, the Orders management page begins to fill up. View these at: WooCommerce > Orders. Each row displays useful details, such as order number and customer name, date of purchase, order status, shipping address, and purchase total.
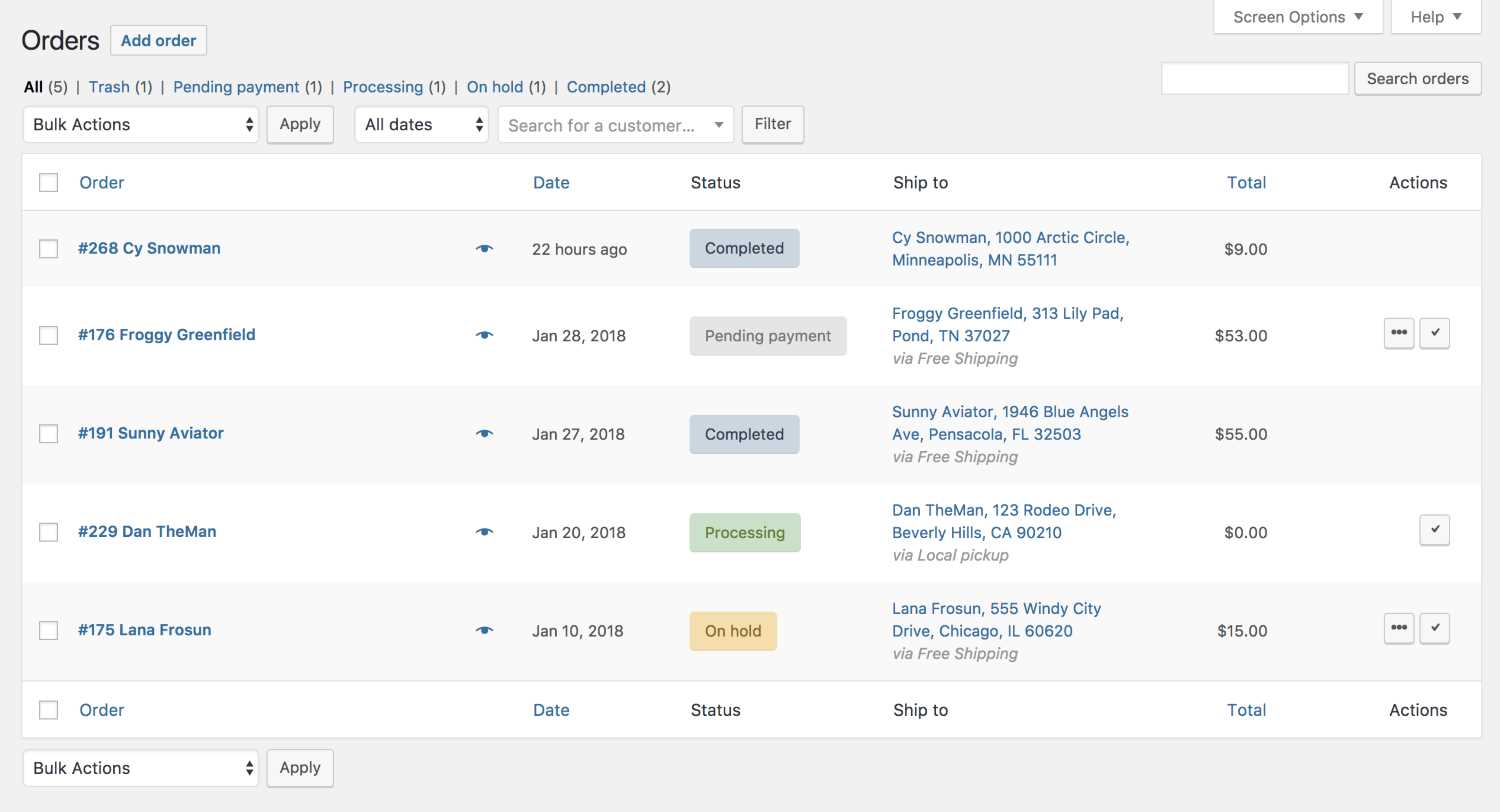
Status
An order also has a Status. Here’s a list of statuses:
- Pending payment – Order received (unpaid)
- Failed – Payment failed or was declined (unpaid). Note that this status may not show immediately and instead show as Pending until verified (i.e., PayPal)
- Processing – Payment received and stock has been reduced – the order is awaiting fulfillment. All product orders require processing, except those that only contain products which are both Virtual and Downloadable.
- Completed – Order fulfilled and complete – requires no further action
- On-Hold – Awaiting payment – stock is reduced, but you need to confirm payment
- Cancelled – Cancelled by an admin or the customer – no further action required (Cancelling an order does not affect stock quantity by default)
- Refunded – Refunded by an admin – no further action required
Adding an Order Manually
- Go to: WooCommerce > Orders.
- Use Add New at the top of the page. The Single Order page appears.
- Input customer details, add line items, apply coupons, apply fees and calculate totals.
- Set a status for the new order, e.g., If it needs to be paid, use ‘Pending’.
- Save.